The Birth of the Sailer Urban Homestead - Part Two
Planting a dormant seed... and watching and waiting for it to burst out of the soil is a powerful experience. My seedlings down in the basement quickly became 'our babies' and our attention to them was rewarded by little peeks of green pushing up and out of the seed start pots. We had a blast noticing the plants from the same families as they grew: the cucumbers & squash looked the same, the cabbage, kale & broccoli looked the same - the onions looked different than the rest. Regardless, whenever something new popped up - we did an excited dance. The first year - (like I'd mentioned in Part One) - I was over eager and planted my summer vegetables WAY too early... including things like pole beans - (which you really shouldn't start inside at all)! I was just so excited and wanted to get a head start on everything. Since we only had a couple of grow lights, I soon ran out of space for my starts, so I moved them to other places around the house. I also planted in anything I could find! Pots and containers of all shapes and sizes... There was SO much experimenting! I am grateful for the risks I took and that I tried whatever I could. In hindsight I've learned so much by that trial and error.

As I look at the above picture - I recall several things.
1. It is very silly to try and start pole beans indoors. Those beans on the end of the bench grew and grabbed onto eachother so much - that when May came around, they were too tangled to separate! The seeds I planted straight into the ground quickly passed them up. Better to plant out beans directly into the ground, like the seed packet says!
2. Though I love the look of terra cotta pots... I now only really use them for a potted herb that I plan to keep in that pot. When the time comes to transplant a plant into the ground, they are very hard to get out. The pots are porous, and the roots kind of attach to the inside, making it hard and stressful on the plant as you try and remove it. Better to save old plastic pots (I ask friends for them - and save any that I have from buying potted flowers, etc.) They are the best to slide transplants out of.
3. I thought it was so fun to plant in that old metal stock pot....but what a mistake to plant so many starts inside of one container! The roots entagle and become impossible to separate without hurting the individual plants. Better to plant one or two individual plants per pot. I have always been generous with my seed sowing. I would rather have too many plants, than not enough - and sometimes you'll get a few seeds that don't germinate. It's fun for me to share potted veggies with friends when I have too many.
4. I started SO many squash plants that when it was time to set them out in the garden, I couldn't fit them all according to the proper spacing. I'm kind of a 'more is always better' type of person - so I just planted them all - I put about 40 squash plants into one row! I was thrilled that they all took off - but when mid-summer came - my squash forest was so dense that it was nearly impossible to find the zucchini that was hidden. Also, by the end of summer - they got hit hard with powdery mildew from the lack of air circulation. Better to space your squash out a bit (though I still always plant a bit closer than recommended - (can't help it... I want to grow a lot of food in a small space!). In Colorado, powdery mildew is almost a guarantee by late summer - but I might experiment with using baking soda early on my soil to try and prevent it.

The above picture is an example of plants getting 'leggy'. These poor babies obviously were started too soon (a couple of bean plants and nasturtiums) - are reaching for the light of the window (not enough) and are probably totally root-bound in such small pots. It was a struggle to de-pot these babies ... they probably did poorly when transplanted....
One of the worst mistakes I made that first year, was planting a bunch of squash plants out into the garden in early May. We had been having warm weather - the plants were getting too big for the pots, and although our safe planting date here in Colorado is usually after Mother's Day - I went ahead and set them into their beds in the garden. What I didn't know was... these warm-loving plants had been raised indoors - and were used to the constant temperatures of our home - (never dipping lower than 65 at night). Late Spring in Colorado's evening lows fall much lower - and the plants did not survive. We had a frost a day later - and I lost 80% of all of the starts I had planted. I will admit I cried like a baby to lose all of those plants! My girls just stared at me as I sobbed and got out my seed packets to start over! My neighbor (an experienced gardener) looked on from her yard as I eagerly had planted too soon... and said she knew I must have been heartbroken after that frost. I had lost 2 months of time on those plants. In the end, it turned out to be fine. I still had plenty of time to get some squash going again - and my harvest was plentiful that year.
I've learned that a plant started indoors must be hardened off before moving outdoors. This involves taking the plants outside and letting them get used to the cooler temps a little at a time, then bringing them back indoors. I watch how they respond each day - (sometimes they wilt a bit from the shock if it's much cooler) but mine usually do fine after 3-4 days.
Despite all of these mistakes - we still had a lot of successes. Because I started so many other plants - we still had plenty to set out, come Mother's Day.
PLANTING UNDER COVER - COLD FRAMES & GREENHOUSES
When we dug up our side yard in 2011 - we moved these smaller raised beds to the south side of our house. I had been inspired by Eric Rochow's podcast & videos and learned how to build a cold frame using recycled windows. This is a way to extend the growing season, since the temperature of these beds will be much warmer (being above ground, and warmed by the glass). We've had success each year with these frames - as long as I remember to lift the glass and vent them on warm days. The temperature can really cook if left closed in direct sun. I've kept salad & spinach alive all winter under glass - though the plants slow way down mid-winter. They are most useful in early spring - getting lettuces started at least a month sooner - and keeping things alive in late fall. I would recommend trying this anywhere - to get a jump on things!


Though the picture below is a funny one of my three oldest, the row cover behind them is another experiment we tried. It was a frame that my husband built to cover the lettuce bed and allow the seeds to start a bit sooner than usual. A row cover like this can be placed over a bed in early spring to warm the soil and prepare it for planting.

Though this row cover worked well - it was too bulky and not a smart use of space after we were done with it. We've now started using a simpler method of pounding a few stakes of re-bar into the soil, then attaching pvc pipe to those re-bar spikes - creating a hoop to cover with plastic. See below:

The plastic can come off when we are done with it, the pipe lifted and stored. This year for 2013, we hope to use this method to cover all of the above beds by late fall - to extend our garden into the winter! A simple barrier of plastic can increase the growing temperature by 20 degrees! Eliot Coleman's Four Seasons Farm is an inspiration to me, as he grows year-round in Maine's harsh climate. If he can keep things alive all winter for his farmer's market - surely we can too!
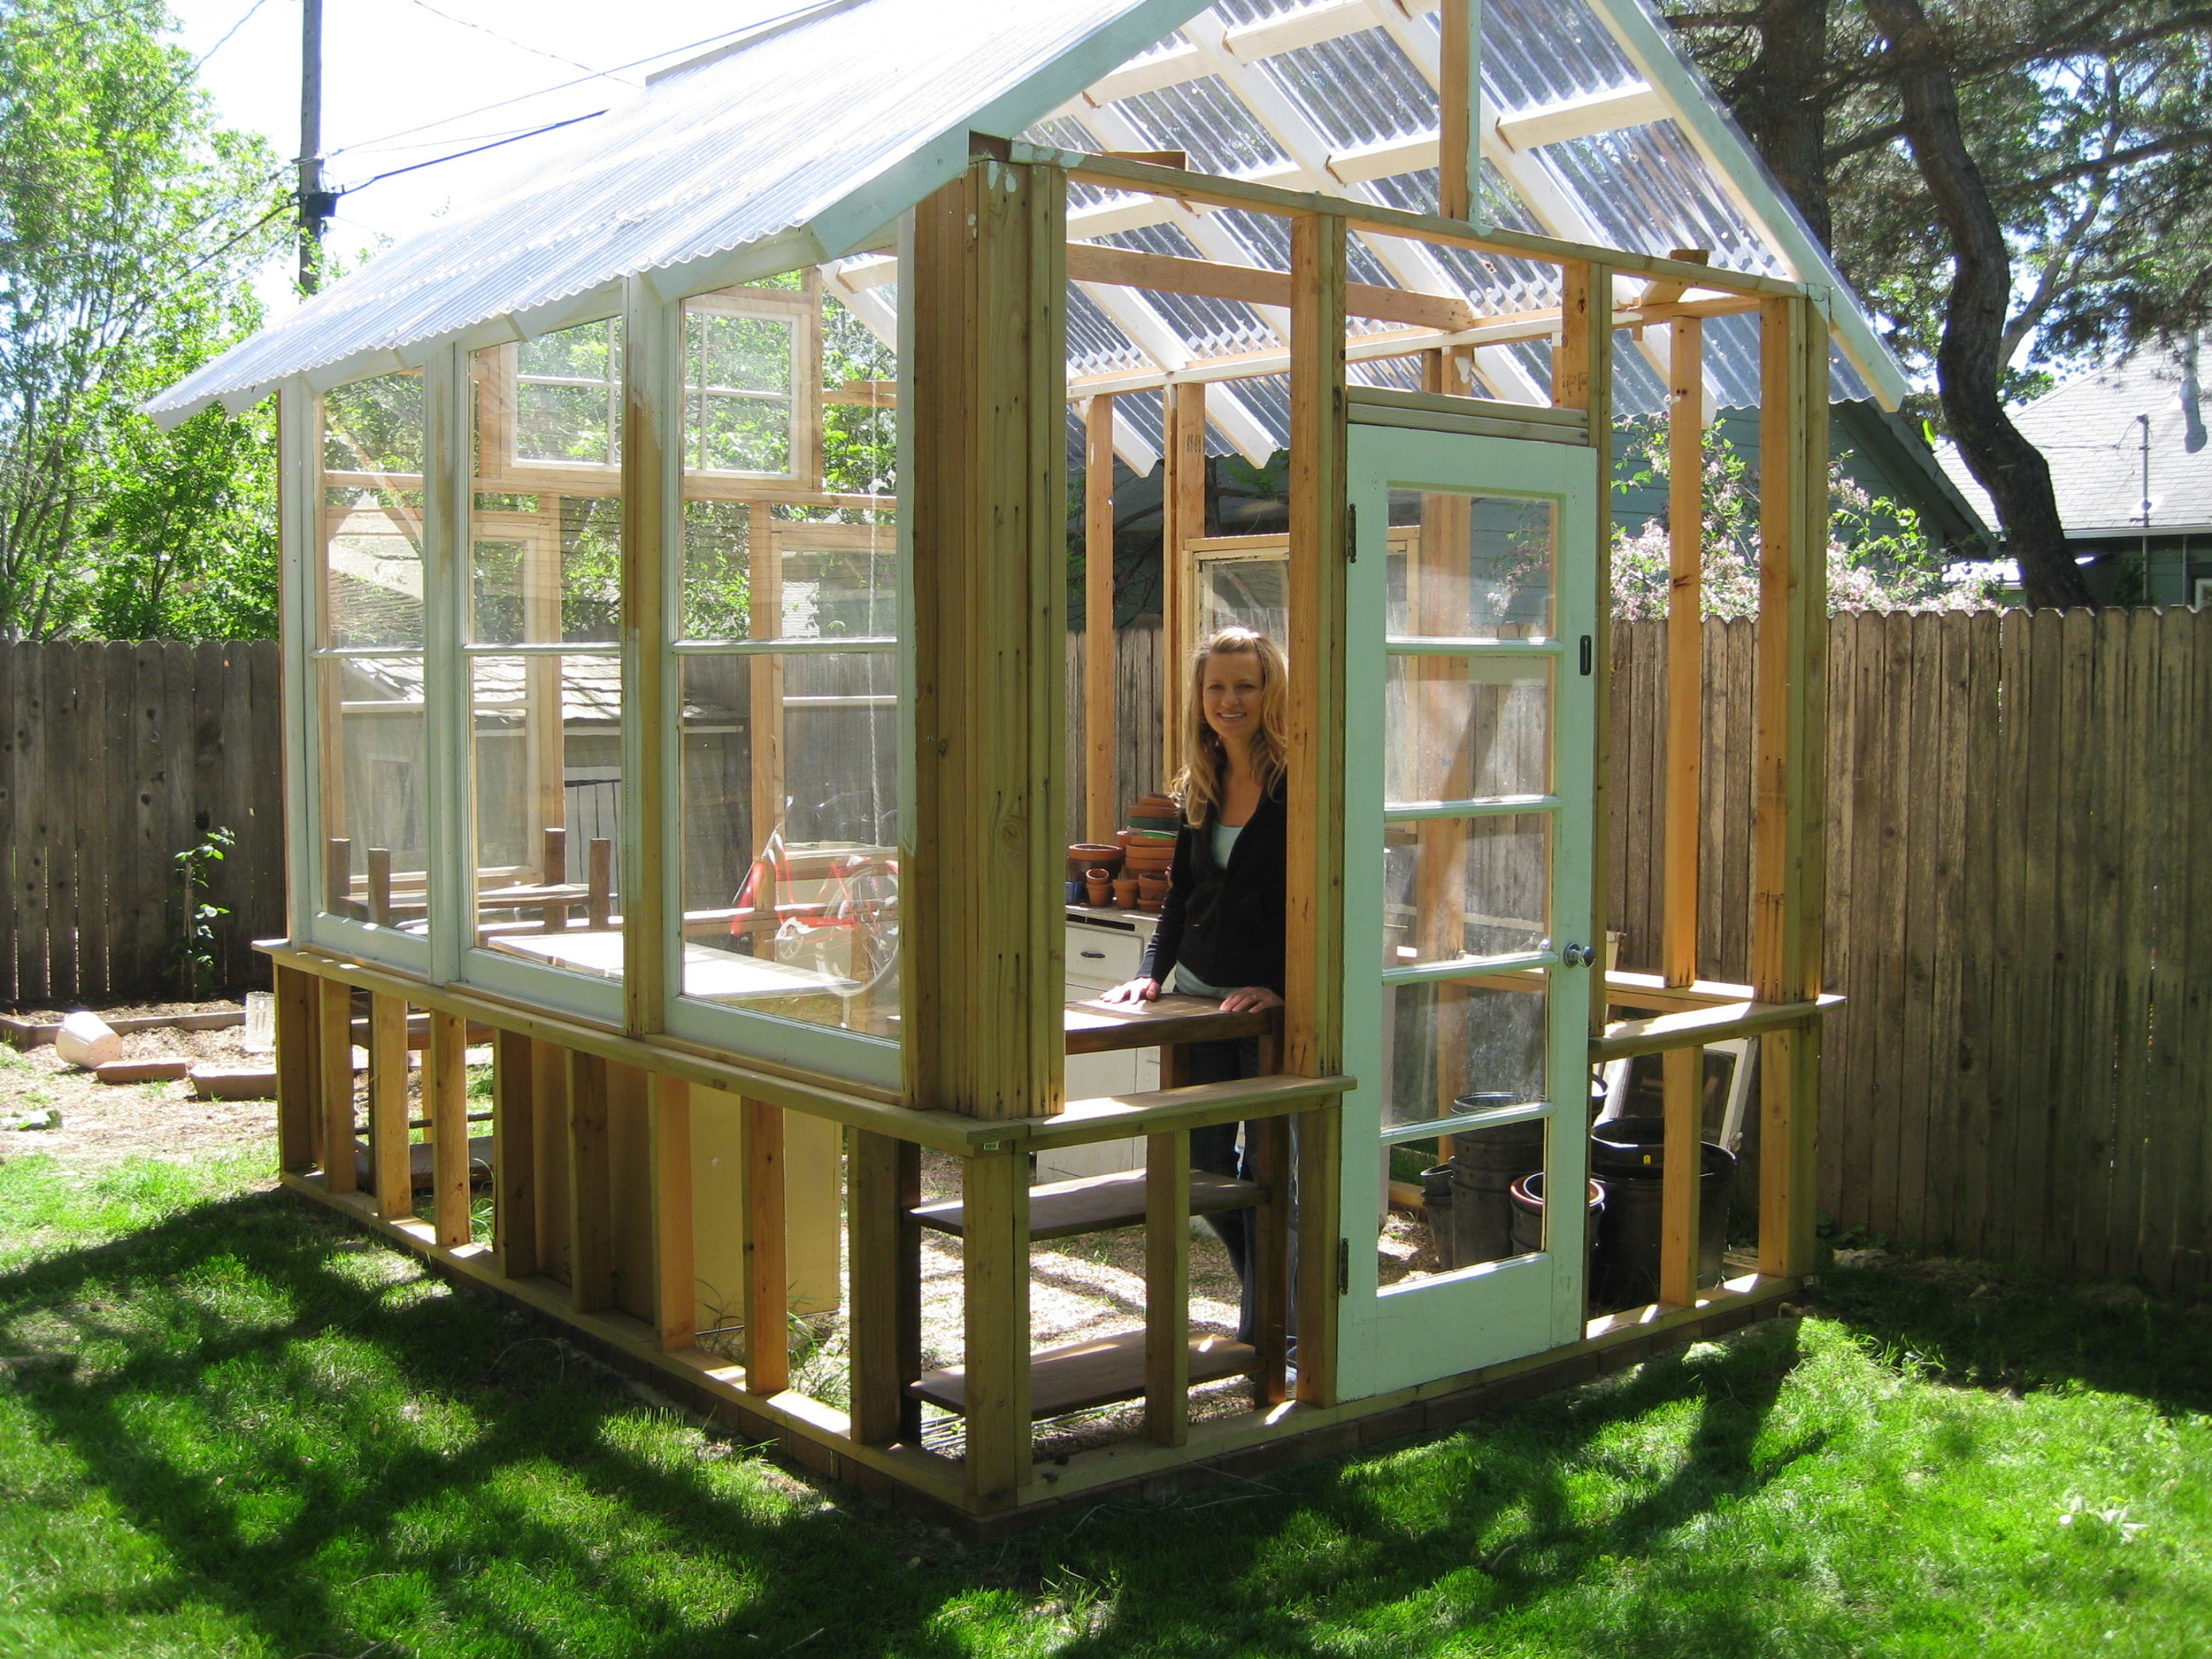
The most exciting addition to our yard & garden in 2011 - 2012 was our permanent greenhouse. We were blessed to find a wonderful stash of old windows that our neighbor had been collecting. He wasn't using them, so traded them to us for some specialty wood that Jeremiah had saved. His generous trade helped us to dream up our greenhouse, as we built it around the windows. We found the door, and a few extra old windows to add at our local recycled building supply store. It was a fun process to lay out the windows we had on the ground, measure, re-arrange, and figure out which ones to use on which side. It was even MORE fun to see the walls going up!

We weren't able to complete the greenhouse the first year - but we got a good start. We've had to learn to be patient and to be thankful for each step, however slow...
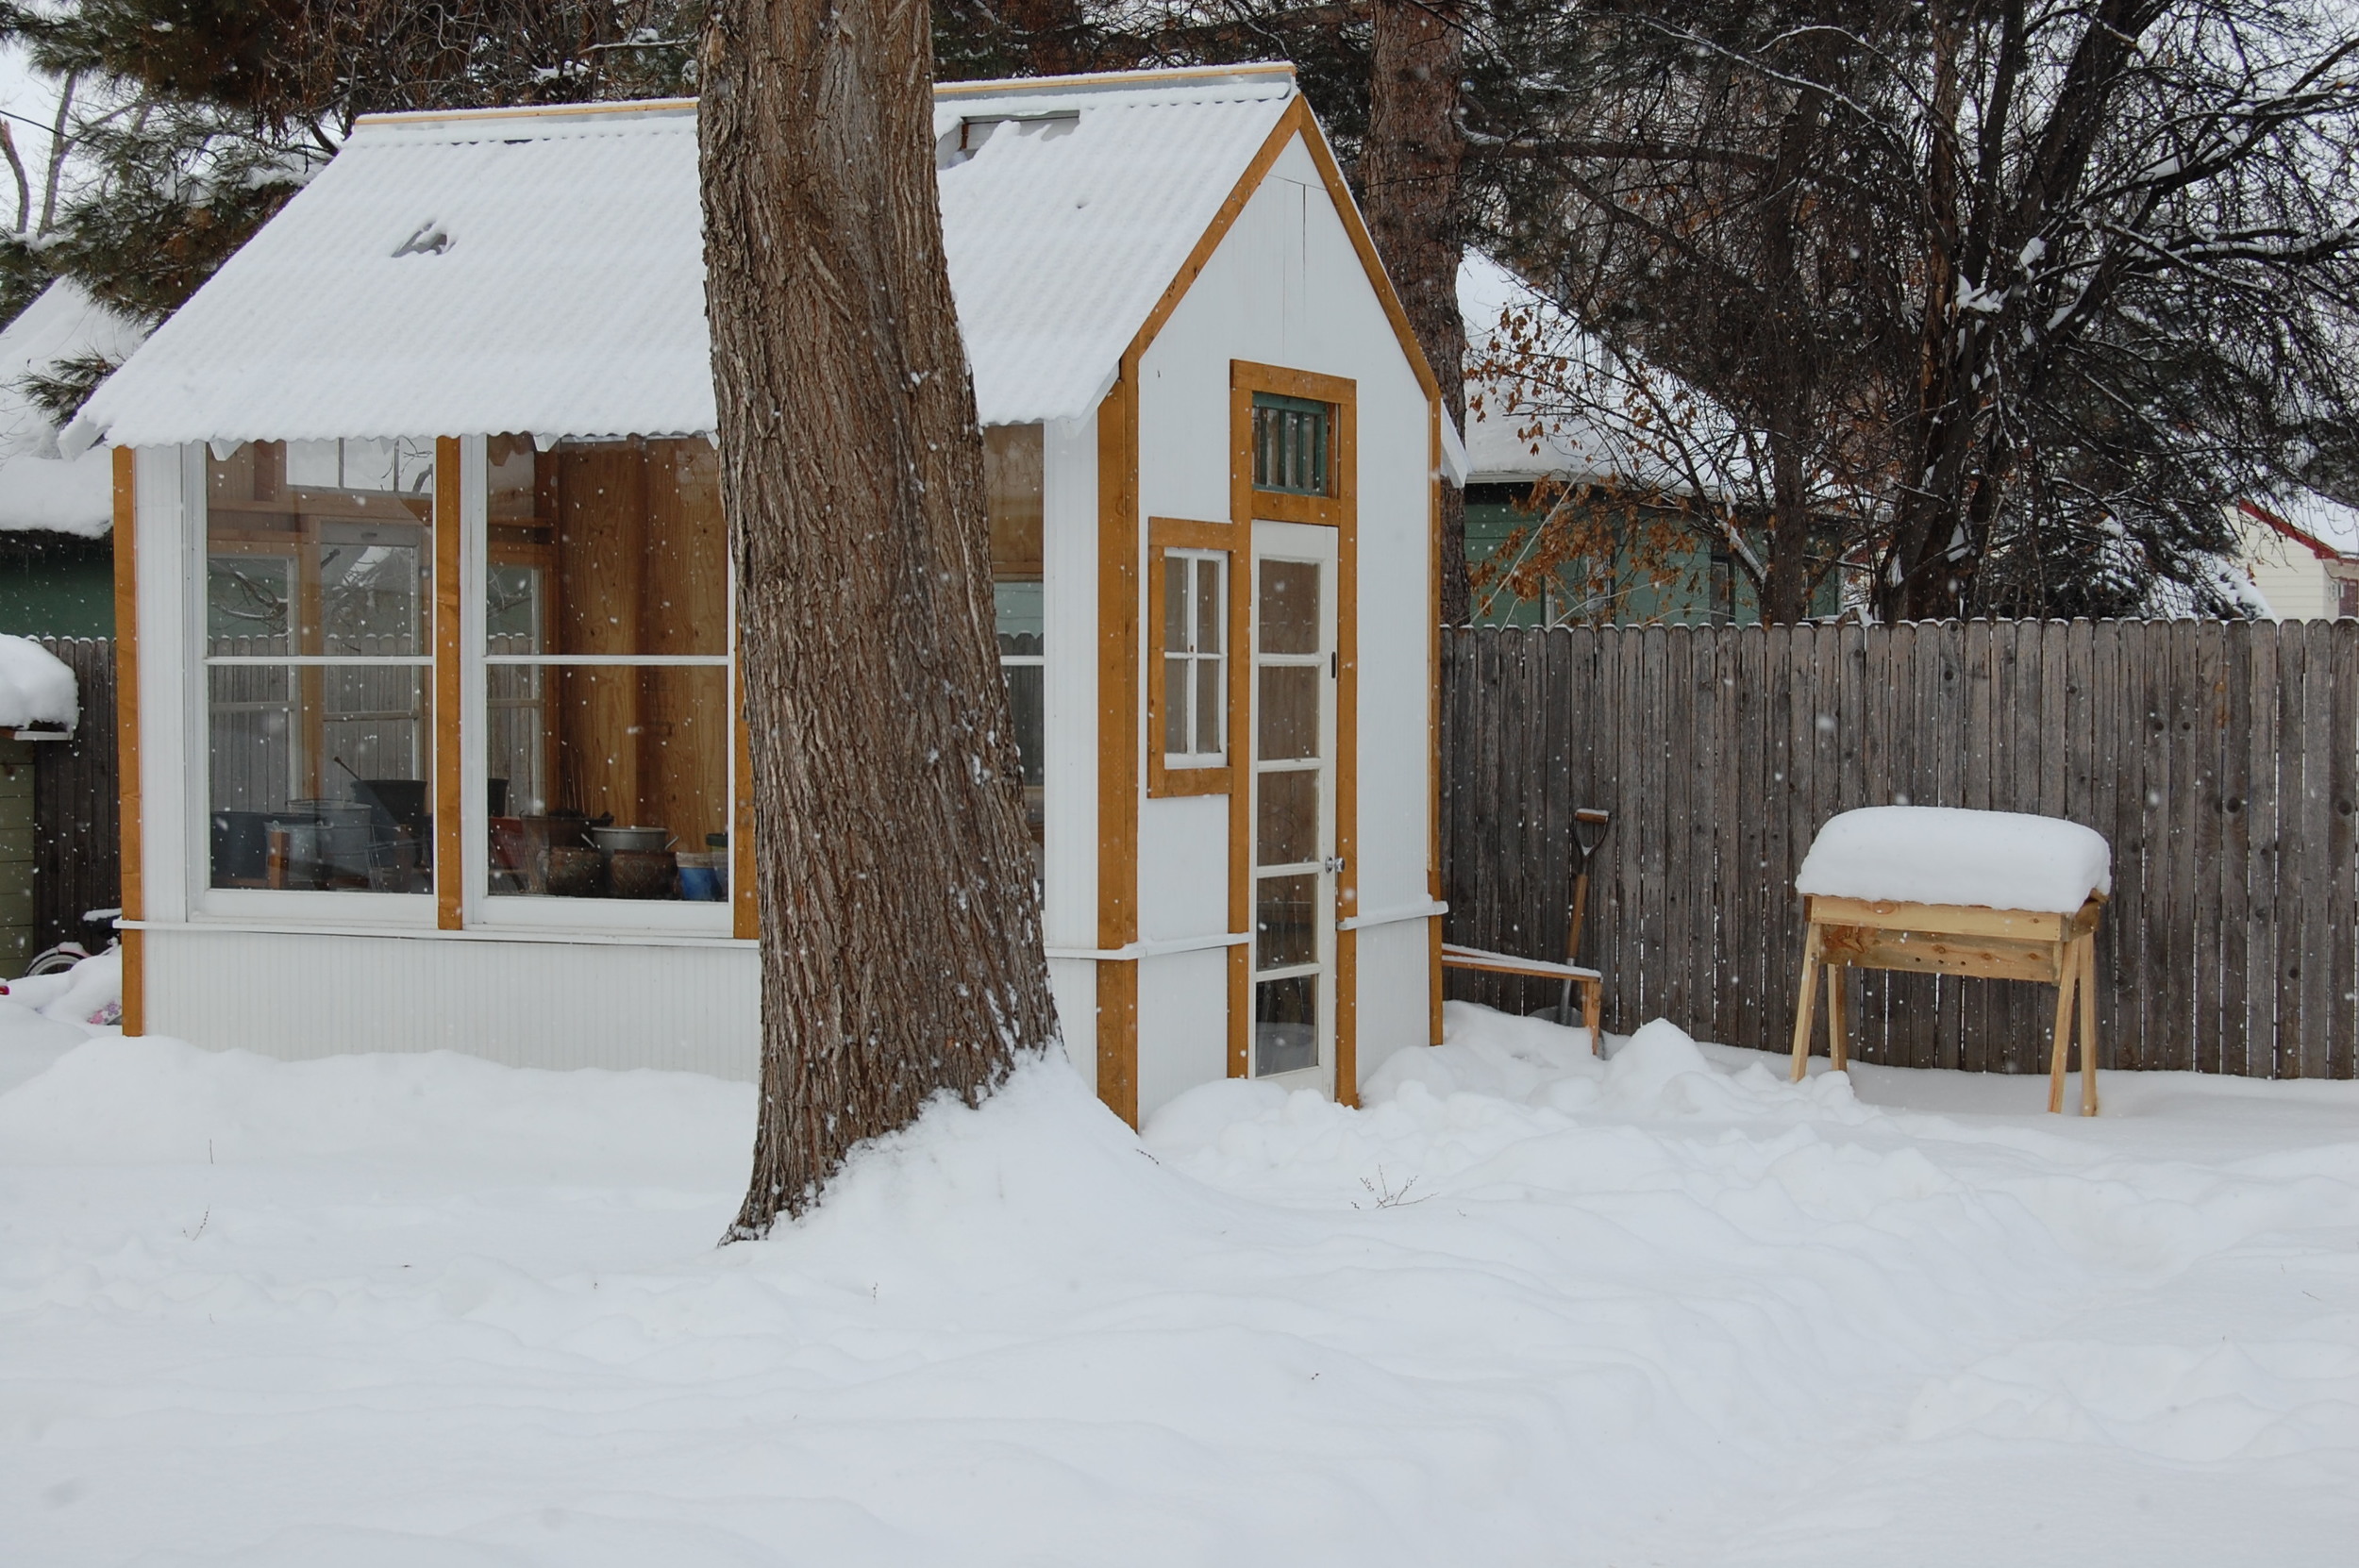
Progress by end of 2011 - with hole in the roof from a heavy snow that sent a branch through.
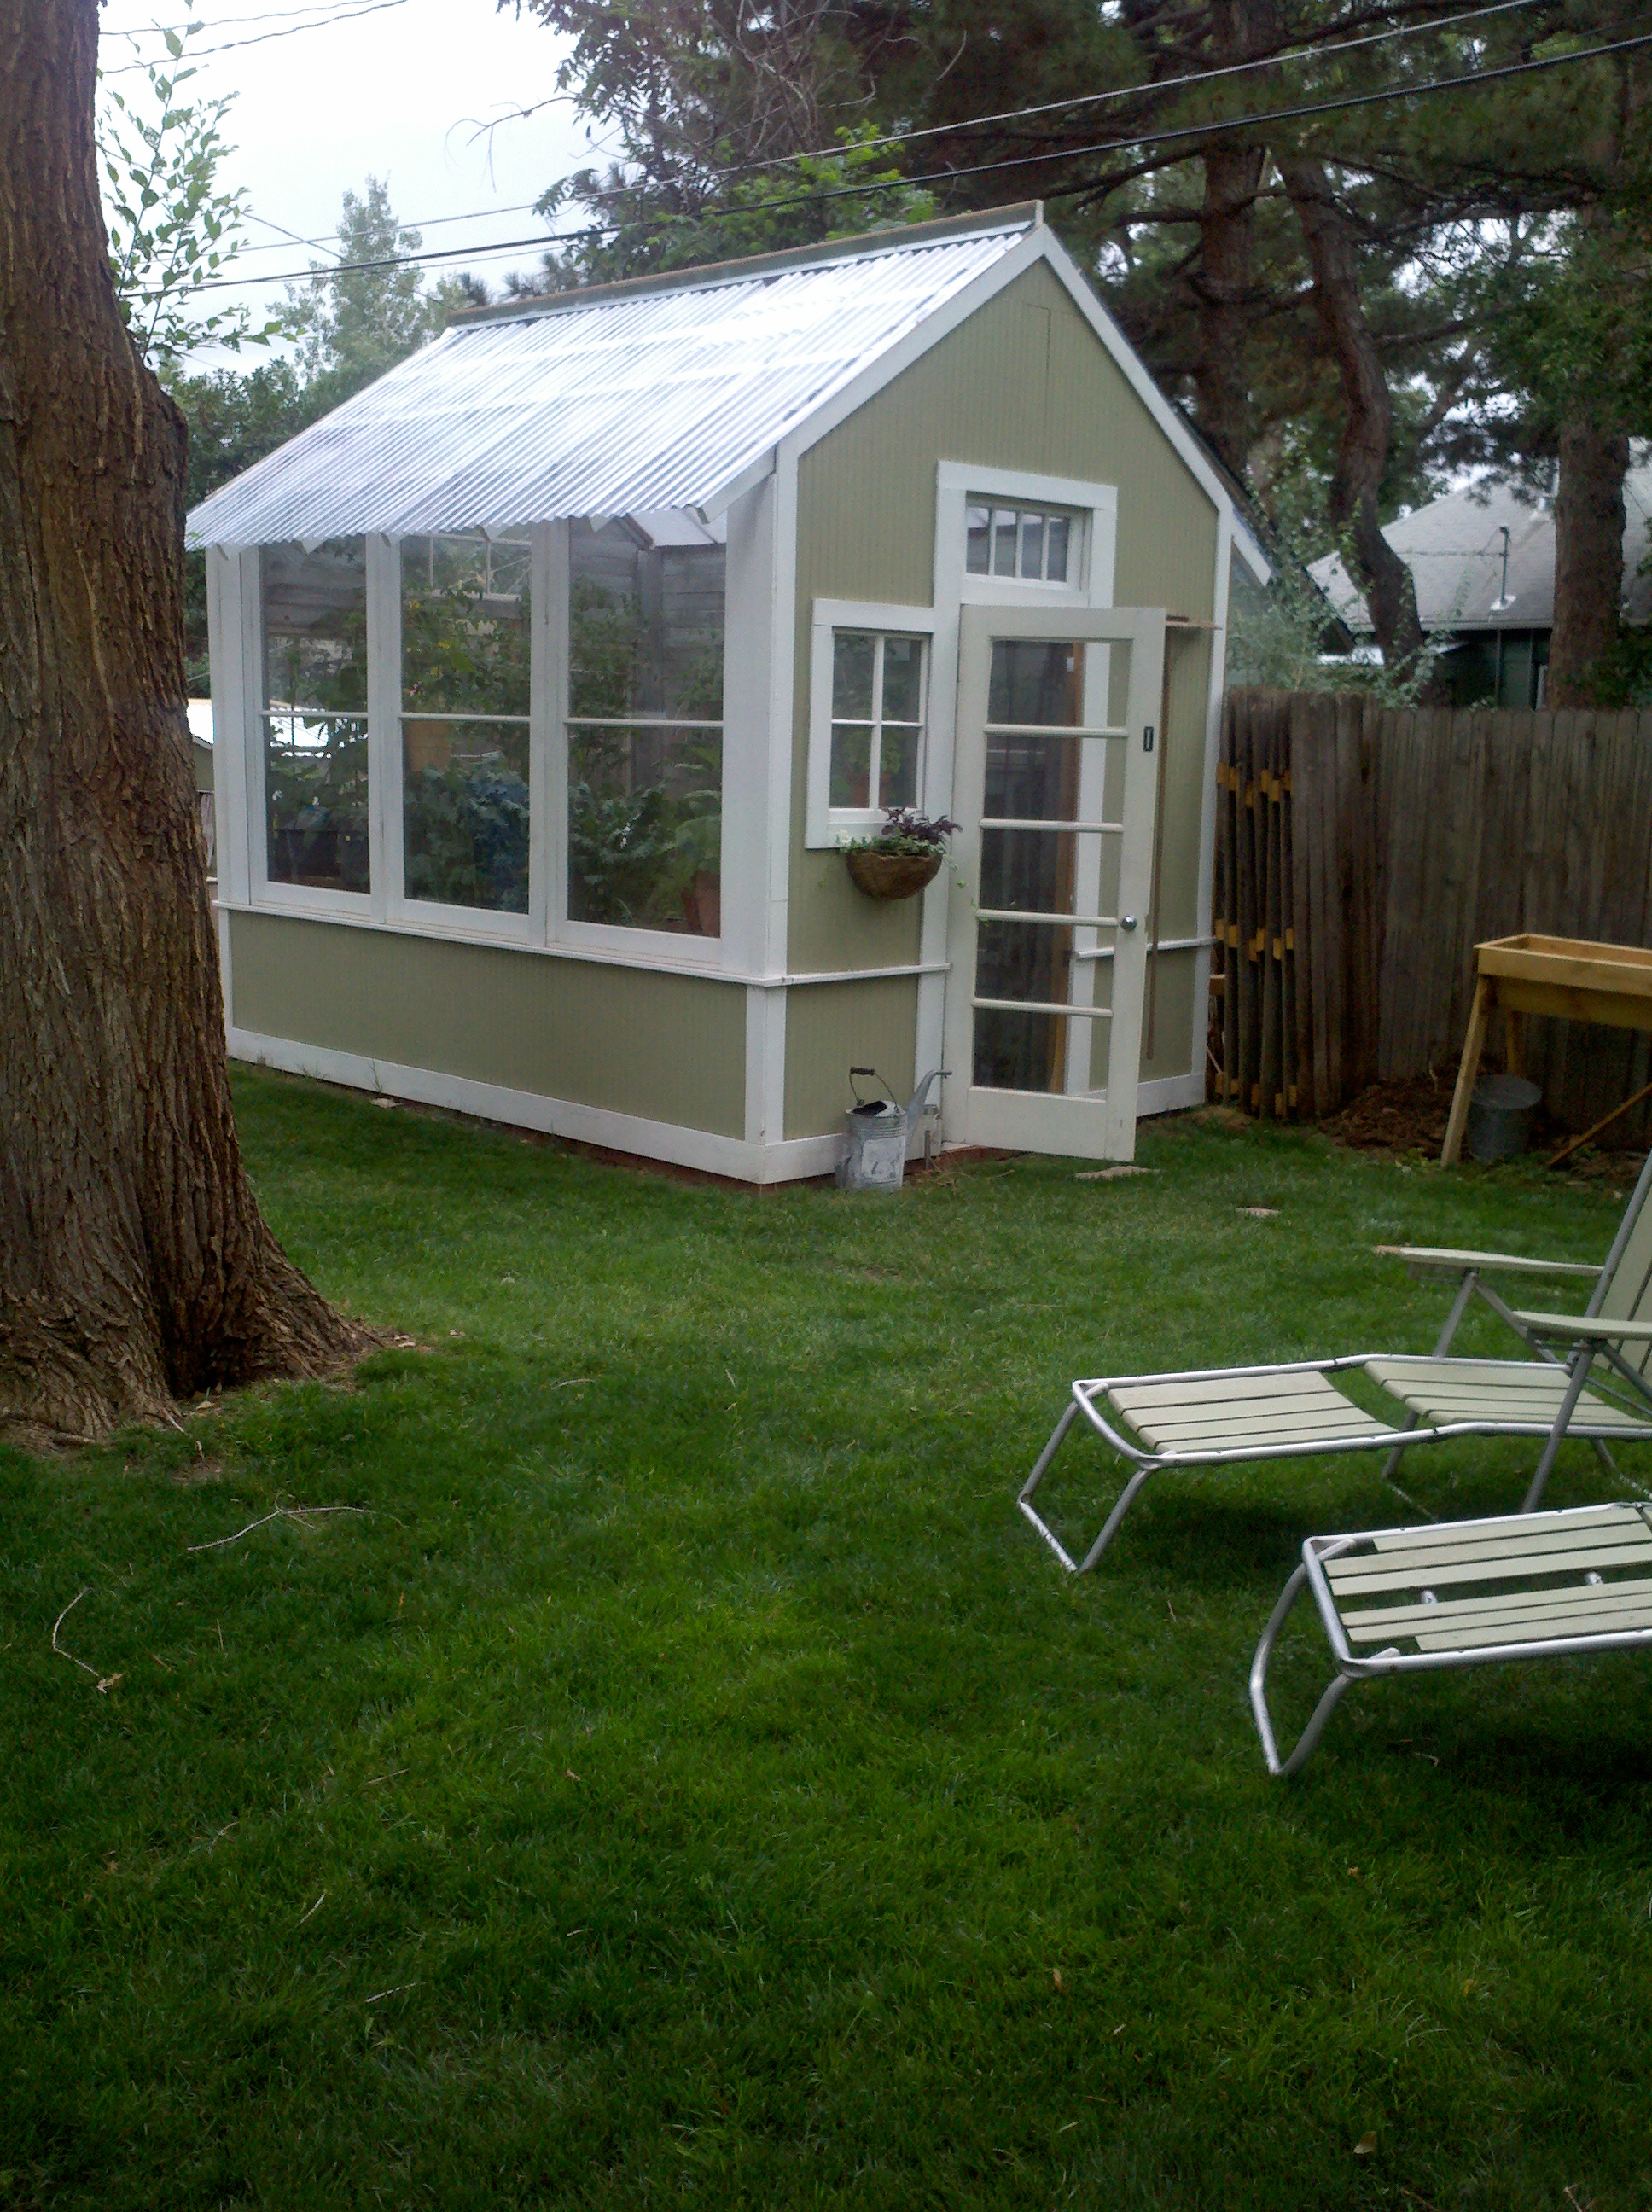
The combination of cold frames, hoop house (row covers) and the greenhouse are a wonderfully helpful way to get an early start on planting - help to transfer indoor seed starts to the garden (thus saving money by purchasing seeds instead of plants). It's a wonderful beginning to do whatever you can - with whatever supplies or resources you have. Take it one step at a time!